In June, we completed a project to replace the control system of an old hydraulic home lift from an Australia client.
Compared to our standard products, this project was quite complex. It involved extensive communication to understand the working principles of the old elevator, which took a lot of our time. However, ensuring the accuracy of the delivered product made it all worthwhile. Upon completion, the client was able to have a fully operational villa elevator for just a few thousand dollars.
Here are the details of the project:
Sydney Client Request
The client had a 90′ hydraulic home lift made in the USA, serving 5 floors, that needed an upgraded control system.
The main reason for the upgrade was that the lift had stopped working, and there were no spare parts or technical support available. The client wanted the lift to work again with easy wiring. The control system was faulty, but the doors, motors, pump, and valves were still in good condition.
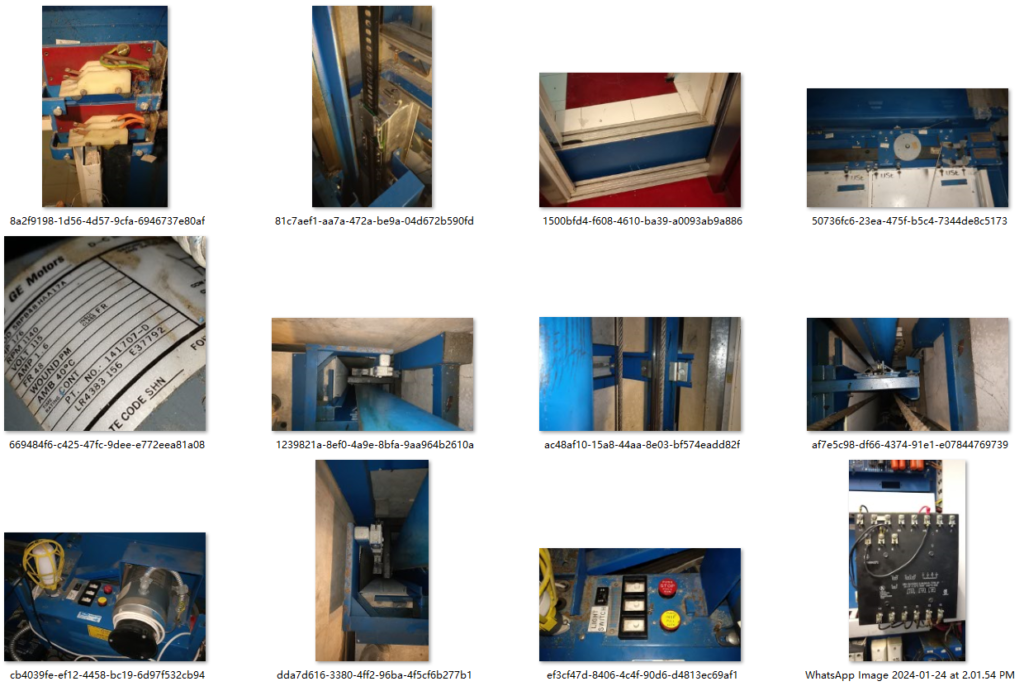
The client sent us photos of all the parts of this old lift, which was very helpful for us to understand the lift better.

Functions Sydney Client Request:
Client listed the function/item for the electric box as but not limit to below:
- Top/bottom final limit
- Top/bottom slowdown limit
- Relevelling
- Travel time protection
- Motor temperature protection
- Controller inspection
- Cartop inspection
- Overload/high pressure
- Phase relay
- Car independent
- Car light/fan switch
- Fire key switch
- Y/△ start
Our Solution
After communicating with the client, we determined that the electric box needed to have the following features:
- Power Supply: Three-phase 240V
- Oil Pump Motor: Three-phase 240V, 5.5KW
- Five Solenoid Valves: Two for ascending, two for descending, and one for both ascending and descending (solenoid valve voltage: DC110V)
- Six Electric Doors: One on each of the five floors and one in the car (door power supply: AC115V/200W; the new system only provides a passive signal to control door opening and closing without a door controller)
- Pump Operation: Pump works during ascent and does not work during descent (one-way power)
- Limit Switches: For maximum and minimum positions
- Speed Settings: For maximum and minimum speeds
- Operation Time Protection
- Overload Protection
- Under/Over Voltage Protection
- Lighting and Fan Control: Both powered by AC110V/1P/100W
- Key Switch: Lock ladder key switch on the call button box on the first floor
- Maintenance Box on the Car Roof: Includes emergency stop, maintenance knob, slow up and down for maintenance, and maintenance lighting (lighting voltage same as above)
- New Car Button Box
- Leveling: Changed to proximity switches
- Touchscreen: To set the sequence of solenoid valve activation due to uncertainty about their working order
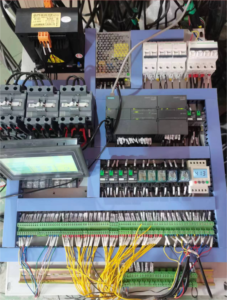
After three weeks of design and assembly, we provided a complete control box set, including limit switches, leveling sensors, trailing cables, circuit diagrams, and wiring diagrams (all cable specifications were listed, and physically marked at the start and end points so installers would know their purpose and how to wire them on site). We determined that the call button boxes could be reused, saving some costs.

Before shipping, we recorded a video on how to use the PLC touchscreen and communicated with the client in advance to reduce time spent on communication during installation. The screen allows easy status viewing since there are many points to check, and having a display makes troubleshooting much simpler.
After receiving our delivered product, the client proceeded with installation and debugging, ultimately reviving the 24-year-old elevator.
Issues and Challenges
During installation, the client encountered some issues. Our technical team provided timely support and quickly resolved these problems, allowing the old equipment to sequentially pass through maintenance mode and normal operation within 7 days. The main questions from the installation technicians were:
Should the leveling point be in the middle of the magnetic strip?
- Answer: Not necessarily, since both ascending and descending involve deceleration and we cannot determine the buffer distance precisely. The magnetic strip can be lengthened or shortened based on the actual situation. For mid-floor leveling errors, we communicated via video to adjust the magnetic strip.
Which down output corresponds to the main valve and which to the high-speed valve?
- DT0: Slow descent valve
- DT1: Fast descent valve
- DT2: Descent hold valve
- DT3: Slow ascent valve
- DT4: Fast ascent valve
Which signals need to be shorted for maintenance mode?
- Answer: NC5/NC6/GM need to be shorted, as well as the upper and lower limit switches. The touchscreen has maintenance up and down functions; the car top must be in maintenance mode to operate the touchscreen.
How to modify the program?
- Answer: We provided the client with a detailed step-by-step video demonstration.
Conclusion
If you also have an old home elevator that needs a control system upgrade or a complete replacement, please contact us. We will provide a solution within one day of receiving all necessary information.
You will get a lift that complies with the EN81-41 standard.


